Mini card with Perfect Blend

IMG_0079

I love making these little mini cards.  Great way to send a little note, and invite friends for coffee?

The best thing about 3×3 cards?  You can get 6 from a sheet of 12×12 inch cardstock… Plus, they’re cute!

To make these I cut a sheet of Whisper White 12×12 cardstock into 3x6inch pieces, then scored on the long side at 3 inches.

Ink the edges of the card base in Baked Brown Sugar ink.

Stamp the Perfect Blend stampset in Early Espresso ink onto Baked Brown Sugar cardstock twice.

Stamp the sentiment onto one of the cups.

Cut around both cup shapes, then cut one in half.

Using Mini Glue Dots, layer the two cup halves onto the card base, with the whole cup over the top (cover the gap!)

IMG_0080

Now, do you fancy a coffee? I do!

Debbie 🙂

MainAd_retired2015_OLO_April2115_CASPUK

Joyful Christmas Cards

I can’t believe we’re already in December! And WOW what a busy month I have ahead of me, as I’m sure we all do 🙂

I’ve been back in my crafting ‘spot’; sat on the living room floor in front of the fire! Nothing like getting toasty (even if a little uncomfortable!) and I came up with these little beauties…

Real Red, Cherry Cobbler & Early Espresso

I love colour, so I had to do a few different colour ways… decided to stick to 3 for this little project based on the amount of other stuff I was doing too 🙂

Surprisingly easy to put together… the fiddliest part was lining up the wreaths on the Big Shot, quickly got the hang of it though thanks to the little tabs.

Colours: Soft Sky, Tempting Turquoise & Tangerine Tango

If you want to make your own, here are the layers I used for mine 🙂

I cut A4 Whisper White cardstock in half, and folded in half again to creat the card blank.

Cut Silver Glimmer Paper to 3/4 x 41/2 inch strips, and cut those to points for the first layer, adhered with Mini Glue Dots

Coloured cardstock was 4 x 2 inches, cut to a ‘flag’ shape, and adhered with Stampin’ Dimensionals

The Wonderous Wreath Photopolymer stampset and Framelits Bundle was then used to create the lovely little wreaths on Whisper White cardstock, and cut using my Big Shot.  The wreaths were adhered with Stampin Dimensionals.

The sentiment I borrowed from the Holiday Home Stampset, and layered on top using Mini Glue Dots.

Then ‘Joy’ was cut from Silver Foil Paper from the Wondrous Wreath framelit set, and adhered with some mini Glue Dots.

The colour combinations I used are;

Real Red, Cherry Cobbler, and Early Espresso

Soft Sky, Tempting Turquoise, and Tangerine Tango

Pear Pizzazz, Old Olive, and Rich Razzleberry

Colours: Pear Pizzazz, Old Olive & Rich Razzleberry

I hope you like!

Products Used:

Cardstock: Whisper White, Cherry Cobbler, Soft Sky, Pear Pizzazz, Silver Glimmer Paper, Silver Foil Sheets

Stamps: Wonderous Wreath (Bundle), Holiday Home

Framelits: Wonderful Wreath

Ink: Real Red, Cherry Cobbler, Early Espresso, Soft Sky, Tempting Turquoise, Tangerine Tango, Pear Pizzazz, Old Olive, Rich Razzleberry

Adhesives: Mini Glue Dots, Stampin’ Dimensionals

Other: Stampin’ Trimmer, Big Shot, Magnetic Platform, Paper Snips

Don’t forget to check out the Weekly Deals too, updated every Wednesday!

See you soon!

Debbie xoxo

A Little Sumthin’ Sumthin’ gift box

Oooh, it’s getting colder! Anyone noticed? Everyone on Facebook certainly has! Haha 🙂

I love this time of year! The leaves have changed colour, nights are longer… Autumn/Winter for me means the comfy jumpers, warm gloves and boots come out of hiding. Yay! And I get to spend my evenings cosied up with my favourite films/books/blogs with my huge snuggly blanket in front of the fire with a big mug of hot chocolate with loads of mini marshmallows 🙂 Mmmm…

I can’t think of a better way to spend cold evenings, and as the big “C” is approaching I wanted to share this cosiness. But I can’t knit blankets, so I came up with these as a cute and quick gift… (I’m thinking teacher gifts & stocking fillers!)

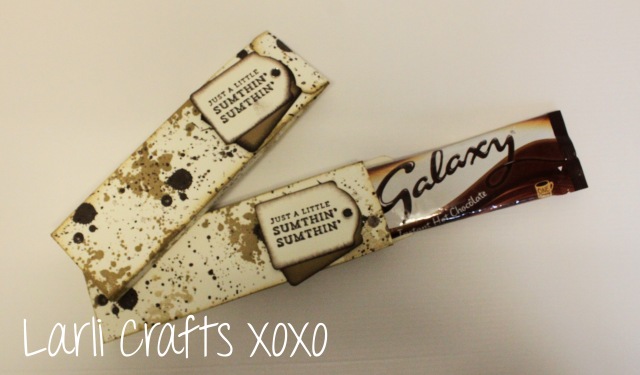
Firstly, I measured my sachet on my Stampin’ Up! Grid Paper. These particular sachets measure 6 1/2 inches tall by 2 inches wide, and almost 1/2 inch deep (that’s a lot of chocolate!)

To make the box I did the following:

1- Cut Very Vanilla cardstock to 8 x 5 1/2 inches.

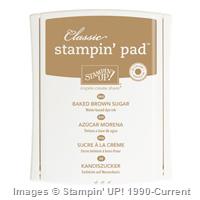
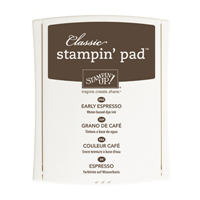
2 – Randomly stamp the large ‘splatter’ from the Gorgeous Grunge stamp set using Early Espresso ink pad. Then the middle sized splatter in Baked Brown Sugar ink, and finally the small splatter in a both ink colours.

3 – With the stamped side facing up; Score the cardstock on the shorter side at 1/2, 2 1/2, 3 and 5 inches.

Score the longer side at 1/2 and 7 1/4 inches. SumthinSumthin1

See PDF template.

4 – Fold and burnish along score lines. (in Grey – Measurements on template in Pink)

5 – Trim as shown (Pink on the template).  Round corners of top flap.

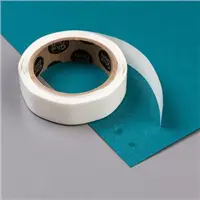
6 – Apply Sticky Strip along outside tab.  Fold the box together to close.

7 – Fold in flaps to close the bottom of the box and adhere with sticky strip.

8 – Sponge all edges of box using Baked Brown Sugar ink (Optional)

9 –  Pinch together the top of the box, so flap folds over to the front.

For the decoration and close:

1 – Stamp A Little Sumthin’ Sumthin’ stamp onto Very Vanilla Cardstock in Early Espresso ink.

2 – Cut out using the Note Tag Punch

3 – Punch another tag from Baked Brown Sugar cardstock

4 – Sponge edges of both tags with Early Espresso Ink

5 – Pierce hole through both tags, and secure with a Candy Dot Brad Base, topped with Early Espresso Candy Dot.

6 – Push brad through front of box, just below flap to secure in place

7 – (Optional) Secure tags in place using mini glue dots

All that’s left to do is put the sachet in the box, and give it away 🙂

Hope you like?

Speak to you soon

Debbie xoxo

Supply List

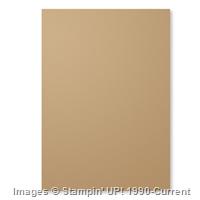
Cardstock: Very Vanilla, Baked Brown Sugar

Stamp sets: Gorgeous Grunge, Sumthin’ Sumthin’

Punches: PL Corner Punch, Note Tag (A/W ’14)

Ink: Baked Brown Sugar, Early Espresso

Embellishments: Neutral Candy Dots, Candy Dot Brad Bases

Adhesives: Sticky Strip, Mini Glue Dots

Equipment: Grid Paper, Stampin’ Trimmer, Simply Scored, Clear Mount Stampin’ Block, Stampin’ Scrub, Stampin’ Mist, Paper Piercing Tool, Sponges